Specific Process Knowledge/Characterization/Sensofar S Neox
The content on this page, including all images and pictures, was created by DTU Nanolab staff, unless otherwise stated.
Feedback to this page: click here
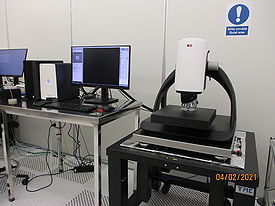
Sensofar S Neox (Optical Profiler)
Unless otherwise stated, all content in this section was done by Berit Herstrøm, DTU Nanolab

The Sensofar S Neox 3D Optical Profiler has a sensor head that combines confocal, interferometry and focus variation techniques as well as thick and thin film measurement capabilities.
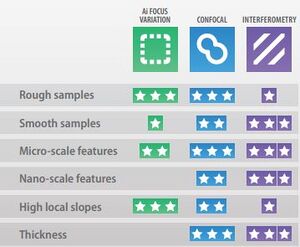
The Neox sensor head provides standard microscope imaging, confocal imaging, confocal profiling, PSI (Phase Shift Interferometry), CSI (Coherence Scanning Interferometry), Active illumination (Ai) Focus Variation and high resolution thin film thickness measurements on a single instrument.
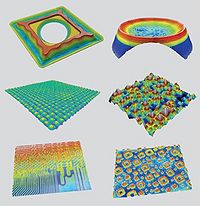
The main purpose is 3D topographic imaging of surfaces, step height measurements in smaller trenches/holes than can be obtained with standard stylus methods (i.e. with aspect ratios higher that 1:1), roughness measurements with larger FOV (Field Of View) than the AFM, but less horisontal resolution.
For most samples the optical profiler provides fast and easy information without any sample preparation. However, it can be necessary to cover thin transparent layers (< 2 µm) with a thin layer of metal.
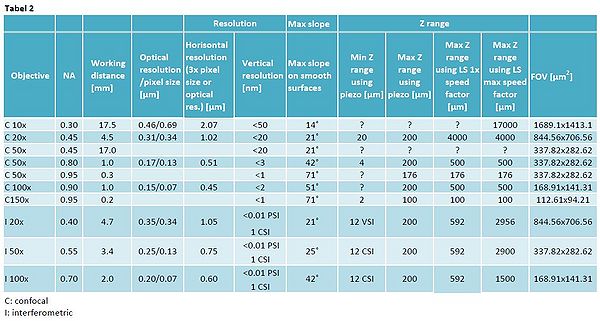
The resolution is limited by the objectives and the pixel resolution.

Analysis software:
- Free analysis software for visualizing and analyzing AFM and Optical profiler files (Sensofar) Gwyddion
- SensoView software from Sensofar can be downloaded from the cleanroom drive :
- \CleanroomDrive\_Equipment\Optical profiler Sensofar\
- We have an extra license to the more advanced SensoMap software. It can be accessed by Remote Desktop: DTU-8CC0321MFL (log-in using your DTU credentials).
The user manual, technical information (SensoSCAN and SensoVIEW manuals) and contact information can be found in LabManager.
Process Information
- Sensofar presentation on how the sensofar works (for the previous system but the techniques are the same) -requires login
- Neox leaflet including specifications - requires login
- Acceptance measurements on the S Neox Sensofar: Media:Acceptance measurements on Nanolab samples.pdf, measured at the acceptances test by Sensofar and Berit Herstrøm@ DTU Nanolab
- Results from the Optical Profiler (Sensofar) acceptance test - for the previous system - expired!!


