Specific Process Knowledge/Characterization/Thickness Measurer: Difference between revisions
Appearance
No edit summary |
No edit summary |
||
| Line 1: | Line 1: | ||
'''Feedback to this page''': '''[mailto:labadviser@danchip.dtu.dk?Subject=Feed%20back%20from%20page%20http://labadviser.danchip.dtu.dk/index.php/Specific_Process_Knowledge/Characterization/Thickness_Measurer]''' | '''Feedback to this page''': '''[mailto:labadviser@danchip.dtu.dk?Subject=Feed%20back%20from%20page%20http://labadviser.danchip.dtu.dk/index.php/Specific_Process_Knowledge/Characterization/Thickness_Measurer click here]''' | ||
Revision as of 15:18, 21 October 2013
Feedback to this page: click here
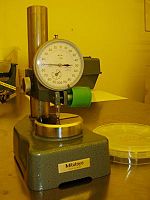
This is a micrometer-screw.

It measures with an accurracy within a few µm. The range is from a few µm up to 5mm. Measure the wafer in the box next to the meter. If this is ok, then other wafers can be measured. There is a calibration device by the DEKTAK. It is calibrated at 750µm.
