Specific Process Knowledge/Characterization/Hardness measurement: Difference between revisions
| Line 74: | Line 74: | ||
Calibration samples available | Calibration samples available | ||
|style="background:WhiteSmoke; color:black"| | |style="background:WhiteSmoke; color:black"| | ||
*277 HV | *277 HV 1 | ||
*464 HV | *464 HV 1 | ||
*704 HV | *704 HV 1 | ||
|- | |- | ||
|} | |} | ||
Revision as of 11:27, 1 February 2018
THIS PAGE IS UNDER CONSTRUCTION
Feedback to this page: click here
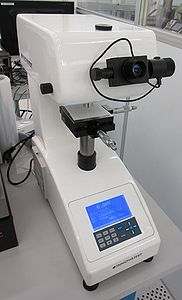
Hardness tester

The purpose is to measure hardness of samples or films. This is done by pressing an indenter (a small pyramid-shaped diamond tip) into sample using a known indentation force. This leaves an indent in the sample. The hardness of the sample can then be derived from the dimensions of the indentation (the softer the material the larger the indentation). The samples should have a reasonably low roughness. Otherwise it can be quite difficult to determine the roughness reliably.
The user manual, technical information and contact information can be found in LabManager:
Equipment info for: Hardness tester
Quality Control - Recipe Parameters and Limits
| Quality Control (QC) for the hardness tester |
|
There is no scheduled calibration of this machine. We do however have three calibration samples which can be used to verify proper operation of the machine. The calibration samples are also good for practicing the measurement procedure. Calibration samples are available in the following three hardnesses: 277 HV, 464 HV and 704 HV. They have been calibrated using a test force of 1 kgf and an indentation time of 10 sec. |
|
Purpose |
Hardness tester |
|
|---|---|---|
|
Performance |
Available test forces |
|
|
Data output |
| |
|
Substrates |
Batch size |
|
|
Substrate materials allowed |
| |
|
Calibration samples available |
|
