Specific Process Knowledge/Characterization/Hardness measurement: Difference between revisions
Appearance
| Line 10: | Line 10: | ||
'''The user manual, technical information and contact information can be found in LabManager:''' | '''The user manual, technical information and contact information can be found in LabManager:''' | ||
'''[http://www.labmanager.danchip.dtu.dk/function.php?module=Machine&view=view&mach= | '''[http://www.labmanager.danchip.dtu.dk/function.php?module=Machine&view=view&mach=434 Hardness tester]''' | ||
==Quality Control - Recipe Parameters and Limits== | ==Quality Control - Recipe Parameters and Limits== | ||
Revision as of 13:39, 25 January 2018
THIS PAGE IS UNDER CONSTRUCTION
Feedback to this page: click here
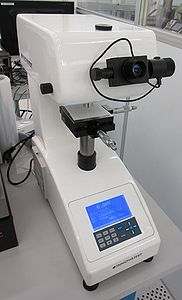
Hardness tester

The purpose is to measure hardness of samples or films. This is done by pressing an indenter (a small pyramid-shaped diamond tip) into sample using a known indentation force. This leaves an indent in the sample. The hardness of the sample can then be derived from the dimensions of the indentation (the softer the material the larger the indentation).
The user manual, technical information and contact information can be found in LabManager:
Quality Control - Recipe Parameters and Limits
| Quality Control (QC) for the hardness tester |
|
The measured standard hardnesses are 2xx HV, 4xx HV and 6xx HV. The QC is performed x times a year. |
|
Purpose |
Hardness tester |
|
|---|---|---|
|
Performance |
Available test forces |
|
|
Data output |
| |
|
Substrates |
Batch size |
|
|
Substrate materials allowed |
|
