Specific Process Knowledge/Characterization/Hardness measurement: Difference between revisions
Appearance
No edit summary |
|||
| Line 2: | Line 2: | ||
==Hardness measurer== | ==Hardness measurer== | ||
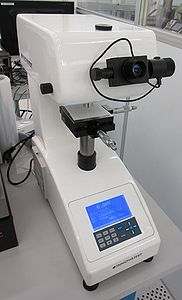
[[Image: | [[Image:InnovaHardness.jpg|thumb|300x300px|Hardness Measurer. Positioned in cleanroom F-2]] | ||
The purpose is to measure hardness of samples or films. | The purpose is to measure hardness of samples or films. | ||
Revision as of 14:55, 19 January 2018
Feedback to this page: click here
Hardness measurer

The purpose is to measure hardness of samples or films.
The user manual, technical information and contact information can be found in LabManager:
Quality Control - Recipe Parameters and Limits
| Quality Control (QC) for the hardness measurer |
|
The measured standard hardnesses are 2xx HV, 4xx HV and 6xx HV. The QC is performed x times a year. |
|
Purpose |
Hardness measurer |
|
|---|---|---|
|
Performance |
Indent force |
|
|
Substrates |
Batch size |
|
| Substrate materials allowed |
|
