Specific Process Knowledge/Characterization/Drop Shape Analyzer: Difference between revisions
Appearance
| Line 24: | Line 24: | ||
|- | |- | ||
!style="background:silver; color:black" align="left"|Performance | !style="background:silver; color:black" align="left"|Performance | ||
|style="background:LightGrey; color:black"| | |style="background:LightGrey; color:black"|Measurement accuracy | ||
|style="background:WhiteSmoke; color:black"| | |style="background:WhiteSmoke; color:black"| | ||
* | *Highly dependent on analysis conditions (image quality and fitting model), usually around ±0.5° | ||
|- | |- | ||
!style="background:silver; color:black" align="left"|Process parameters | !style="background:silver; color:black" align="left"|Process parameters | ||
Revision as of 13:58, 10 January 2014
Feedback to this page: click here
THIS PAGE IS UNDER CONSTRUCTION
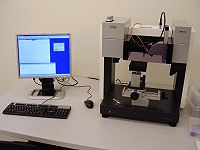
The Drop Shape Analyzer
The Krüss DSA 100S Drop Shape Analyzer will analyze the shape a drop of liquid on a surface, or suspended from a needle, in order to calculate the contact angle, or the surface tension, respectively.

The user manual, user APV(s), technical information, and contact information can be found in LabManager:
Drop Shape Analyzer in LabManager
An overview of the performance of the Drop Shape Analyzer
| Purpose | Imaging and analysis of of the shape of the interface between liquid and air |
|
|---|---|---|
| Performance | Measurement accuracy |
|
| Process parameters | Available liquids |
|
| Sample requirements | Substrate material allowed |
|
| Substrate size |
| |
| Batch size |
|
