Specific Process Knowledge/Lithography/EBeamLithography/RaithElphy
The contents on this page, including all images and pictures, was created by DTU Nanolab staff unless otherwise stated.
Feedback to this page: click here
Manual
OBSOLETE! This tool does not exist at DTU Nanolab any longer.
Technical Information

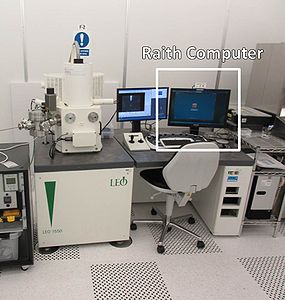
The Raith Elphy system is located in the cleanroom in the F2 room, where the SEM LEO lies. The tool is integrated with the LEO microscope, but is partially controlled through a dedicated PC.
For an overview on the SEM imaging capabilities (often relevant during patterning as well), refer to the general SEM page.
For information regarding patterning, see comparison table available here.
Getting started
- To request an e-beam training session, contact e-beam@nanolab.dtu.dk; a DTU Nanolab personnel will hereafter provide a time slot. Users require 2 training sessions before being allowed full access to the machine. Please be sure to fulfill all requirements (see below) when asking for training on this equipment.
- For other/general inquiries regarding this equipment, you can contact directly Lean Pedersen.
Before you request for a training on the machine, fulfill the following steps:
Be trained on the following machines:
(Contact Training to obtain missing items)
- SEM LEO. The Raith e-beam exposure is performed through the LEO microscope. Operating the microscope for regular imaging is always the first step in the patterning process. Being able to navigate the SEM software and to obtain high quality images will come handy to avoid spending hours without good results. If you have no previous SEM experience, you may need to be trained and get practice on a different instrument before moving to the LEO, so plan ahead.
- Spinner and Developer tools according to your process flow.
Create your layout:
- Prepare your pattern using a layout software (L-edit, CleWin, CAD) and export that to GDS format. Check your GDS-file by importing it in e.g. CleWin or L-edit.
- Additional functionality (e.g. single shot lines/points, dose modulation, etc.) can be obtained using directly the editor inside the Raith Elphy software. After the first training, it can be useful to prepare and/or test the layout directly in this proprietary editor.
- If you are unsure of the patterning parameters to use, include test structures (shape, dimension) in your layout to identify optimal parameters according to the desired resolution.
Gather Experience
- As mentioned before, the more experienced you are with imaging on the LEO, the more successful your patterning sessions will be. Get acquainted with the microscope software before sitting there for your exposures.
- Try consulting a fully trained colleague of yours, and consider assisting him/her when she or he e-beam writes, to gather as much knowledge as possible about your desired e-beam process, e.g. which acceleration voltage, working distance, doses, are typically used.
- Study the manual for the machine, available here
Prepare a process flow
- Describe your entire process in a process flow. The process flow should include all information such as type and thickness of resist, size and type of substrate, which processes are to be done before and after e-beam writing. Find process flow templates here. Attach your process flow to your request for training.
- For the Raith tool, DTU Nanolab expects users to perform process development by themselves. All the users are welcome to contribute to the shared knowledge by sharing their recipes, but no quality check or default recipes are available for this machine.
General Rules
All General Rules applicable to the SEM LEO apply to the RaithElphy as well.
To use the e-beam writer, simply book the SEM LEO via LabManager, as you would do for SEM imaging.
- When your session is over and you log out, remember to register in the logbook the Raith Session ("yes"), sample (substrate and resist), and acceleration voltage. You can use the comment section to annotate any process detail you may want to have registered, or other remarks e.g. unexpected behavior of the tool.
- If you can't use your booking, or you are deleting one, please always remember to send an email to "Cleanroomuser-list (DCH)" to make other users aware they can use the tool.
Samples


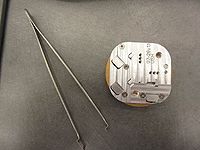
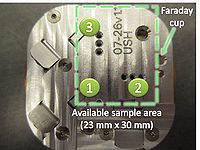
The default holder can fit only chips, up to 3, with sizes of approximately 1 x 1 cm2 each. The maximum available area is approximately 2.3 x 3 cm2.
If needed, a larger chip or wafer can be mounted on a holder without a Faraday's cup, which could add some difficulty to your patterning process.
