Specific Process Knowledge/Back-end processing/Polymer Injection Molder/Injection: Difference between revisions
Created page with "== Closing mould == Injection is a very important part of the injection molding cycle. justing parameters on the ''''Mold Close'''' screen: [[File:02-inject.png|600px|thumb|..." |
|||
| Line 1: | Line 1: | ||
== Closing mould == | == Closing mould == | ||
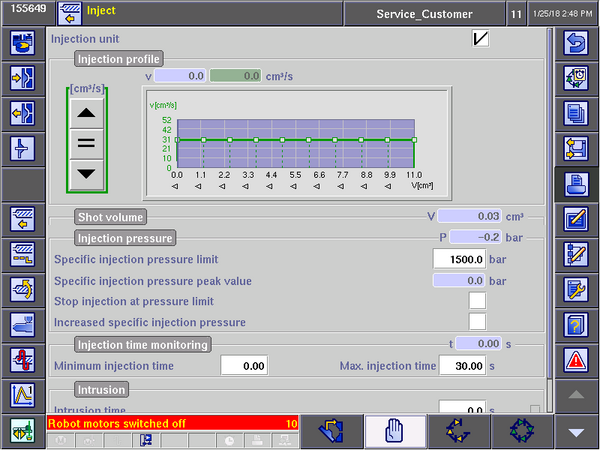
Injection | Injection parameters are very important in injection molding optimization. The injection speed will of course determine how long time it takes to fill the cavity. It also has a large influence on the rheology of the polymer melt. Generally, viscosity of polymer melt will decrease with increasing injection speed (an effect known as shear thinning). The injection speed also influences how structures are filled and to what extent the air inside the cavity has time to escape as polymer is injected. It therefore often takes some optimization to achieve all desired sample properties. Injection speed settings are adjusted in the ''''Inject'''' screen: | ||
[[File:02-inject.png|600px|thumb|left|Mold close and mold protection settings]] | [[File:02-inject.png|600px|thumb|left|Mold close and mold protection settings]] | ||
Revision as of 15:23, 25 January 2018
Closing mould
Injection parameters are very important in injection molding optimization. The injection speed will of course determine how long time it takes to fill the cavity. It also has a large influence on the rheology of the polymer melt. Generally, viscosity of polymer melt will decrease with increasing injection speed (an effect known as shear thinning). The injection speed also influences how structures are filled and to what extent the air inside the cavity has time to escape as polymer is injected. It therefore often takes some optimization to achieve all desired sample properties. Injection speed settings are adjusted in the 'Inject' screen:

- The closing velocity (green curve) can be set as desired, but avoid running at more than 80% of full speed. It is advised to lower the velocity close to the fully open and fully closed positions (as illustrated in the screenshot). This will help avoid closing procedures where the mold slams violently shut.
- The closing force (red curve) can also be set as desired. A good starting point is to let the green and red curves follow each other. But be aware that the red (closing force) curve should NOT fall off to a very low value towards the fully close (0 mm) position. Leave the closing force around 4-5 kN towards the closed position (as illustrated in the figure). If the closing force it set too low at 0 mm, you will get mold protection errors (you're asking the machine to close the mold using a very low force which at some point cannot even overcome the friction of the mold parts when the two halves meet during the final part of closing).
- Avoid setting the 'Opening stroke' to the maximum value, since this can cause the mold to slam against the end stop every time it opens. Keep the opening stroke 3-5 mm below the maximum value (and remember that the robot take-off position will change slightly when you modify the opening stroke).
- The clamp force is usually set to (or close to) the maximum clamping force (450 kN) to ensure the mold is kept tightly closed during injection. In some cases it may be beneficial to lower the clamping force to allow for better degassing during injection. If you experience flashing (polymers escapes the cavity during injection) you should increase clamping force.
- The 'Mold protection monitoring start' distance should be set to the length of the sample. For the samples currently made at DTU Danchip this is 80 mm.
