LabAdviser/314/Preparation 314-307/Soft-matter: Difference between revisions
| (64 intermediate revisions by 2 users not shown) | |||
| Line 2: | Line 2: | ||
'''Feedback to this page''': '''[mailto:labadviser@nanolab.dtu.dk?Subject=Feed%20back%20from%20page%20http://labadviser.nanolab.dtu.dk/index.php/LabAdviser/314/Preparation_314-307/Soft-matter click here]''' | '''Feedback to this page''': '''[mailto:labadviser@nanolab.dtu.dk?Subject=Feed%20back%20from%20page%20http://labadviser.nanolab.dtu.dk/index.php/LabAdviser/314/Preparation_314-307/Soft-matter click here]''' | ||
''This section is written by DTU Nanolab internal if nothing else is stated.'' | |||
[[Category:314]] | [[Category:314]] | ||
[[Category:314-Preparation]] | [[Category:314-Preparation]] | ||
| Line 11: | Line 12: | ||
== Leica EM GP2 == | == Leica EM GP2 == | ||
Plunge freezing is a cryo-fixation method used to preserve samples in their | Plunge freezing is a cryo-fixation method used to preserve samples in their native state prior to cryo-electron microscopy. The EM GP2 plunge freezes fluid or extremely thin samples spread on an electron microscopy grid into liquid ethane and afterwards excess fluid is removed by automatic blotting. Prior to freezing, the sample is maintained in a temperature and humidity controlled environmental chamber which is adjustable between +4°C and +60°C and room humidity to 99 %. | ||
The main steps of this technique is as follows:<br /> | The main steps of this technique is as follows:<br /> | ||
1. The sample is spread | 1. The sample is spread onto a glow discharged EM grid <br /> | ||
2. The liquid droplet is then blotted with filter paper until only a very thin film of fluid remains <br /> | 2. The liquid droplet is then blotted with filter paper until only a very thin film of fluid remains <br /> | ||
3. The grid is then rapidly plunged into a cryogen (usually liquid ethane) <br /> | 3. The grid is then rapidly plunged into a cryogen (usually liquid ethane) <br /> | ||
| Line 21: | Line 22: | ||
[https://labmanager.dtu.dk/view_binary.php?class=MiscDocument&id=15&name=Leica_EM_GP2_Operating_manual.pdf Operating manual] ''- requires login''<br /> | |||
[[File:Plunge Freezer (2).jpg|400px|left|thumb|Leica EM GP2 Location at DTU Nanolab Building 314 Room 014 (Tecnai T20 room)]]<br clear="all" /> | [[File:Plunge Freezer (2).jpg|400px|left|thumb|Leica EM GP2 Location at DTU Nanolab Building 314 Room 014 (Tecnai T20 room)]]<br clear="all" /> | ||
| Line 65: | Line 66: | ||
== RMC MT-7 Microtome == | == RMC MT-7 Microtome == | ||
Our RMC MT-7 Microtome is a vintage piece of equipment and can be used for | Our RMC MT-7 Microtome is a vintage piece of equipment and can be used for specimen sample preparation for SEM/EDX analysis and/or for cutting relative thin slices (approx. 200nm thick) for TEM analysis. First, the specimen needs to be embedded into a resin or an epoxy, and then can be sectioned using a glass or diamond knife. | ||
| Line 75: | Line 76: | ||
== Leica EM UC7 Ultramicrotome== | == Leica EM UC7 Ultramicrotome== | ||
The Ultramicrotome Leica EM UC7 provides easy preparation of | The Ultramicrotome Leica EM UC7 provides easy sample preparation of ultrathin sections for TEM, SEM, AFM and LM application. It is suitable for highly skilled or absolute beginners. The Leica ultramicrotome can provide ultra thin sectioning of sample embedded in a resin/epoxy block with a feed range of 1 nm up to 15 µm. Glass or diamond knife can be used for the ultra sectioning of the samples. | ||
The Leica ultramicrotome | |||
| Line 87: | Line 85: | ||
4. Fishing sections <br /> | 4. Fishing sections <br /> | ||
5. Transfer to an EM grid <br /> | 5. Transfer to an EM grid <br /> | ||
[https://labmanager.dtu.dk/view_binary.php?class=MiscDocument&id=15&name=EM_UC7_Operating_manual.pdf Operating manual] ''-requires login''<br /> | |||
[[File:Leica EM UC7.jpg|400px|left|thumb|Leica EM UC7 Location at DTU Nanolab Building 307 Room 906]]<br clear="all" /> | [[File:Leica EM UC7.jpg|400px|left|thumb|Leica EM UC7 Location at DTU Nanolab Building 307 Room 906]]<br clear="all" /> | ||
| Line 99: | Line 96: | ||
== Leica EM FC7 Cryo-Ultramicrotome == | == Leica EM FC7 Cryo-Ultramicrotome == | ||
Within minutes the Leica EM UC7 ultramicrotome can change to a cryo-ultramicrotome by mounting the cryo chamber EM FC7. | Within minutes the Leica EM UC7 ultramicrotome can be change to a cryo-ultramicrotome by mounting the cryo chamber EM FC7. Using the cryo-ultramicrotome, cryo-sections (-15° to -185°C) can be prepared for TEM, SEM, AFM and LM applications. | ||
| Line 105: | Line 102: | ||
1. Set up the cryo chamber EM FC7 to the EM UC7 apparatus <br /> | 1. Set up the cryo chamber EM FC7 to the EM UC7 apparatus <br /> | ||
2. Mount both the trim and sectioning diamond knives to the knive holder and set up in the cryo chamber <br /> | 2. Mount both the trim and sectioning diamond knives to the knive holder and set up in the cryo chamber <br /> | ||
3. | 3. Connect the pump tube between the liquid nitrogen Dewar and the ultramicrotome apparatus <br /> | ||
4. | 4. Fill up liquid nitrogen Dewar <br /> | ||
5. Let equipment to cool down for 1 hour <br /> | 5. Let equipment to cool down for 1 hour <br /> | ||
6. Meanwhile prepare samples <br /> | 6. Meanwhile prepare samples (Cut big samples to smaller pieces) <br /> | ||
7. | 7. Freeze sample in liquid nitrogen and mount sample <br /> | ||
8. Trimming and ultrasectioning of sample <br /> | 8. Trimming and ultrasectioning of sample <br /> | ||
9. Collecting sections and transfer to an EM grid <br /> | 9. Collecting sections and transfer to an EM grid <br /> | ||
[https://labmanager.dtu.dk/view_binary.php?class=MiscDocument&id=15&name=EM_FC7_Operating_manual.pdf Operating manual] ''- requires login''<br /> | |||
[[File:Leica EM FC7 Cryo-Ultramicrotome.jpg|400px|left|thumb|Leica EM FC7 Location at DTU Nanolab Building 307 Room 906]]<br clear="all" /> | [[File:Leica EM FC7 Cryo-Ultramicrotome.jpg|400px|left|thumb|Leica EM FC7 Location at DTU Nanolab Building 307 Room 906]]<br clear="all" /> | ||
| Line 124: | Line 121: | ||
= KnifeMaker= | = KnifeMaker= | ||
== LKB Knifemaker 7801A == | == LKB Knifemaker 7801A == | ||
At DTU Nanolab we offer the possibility to make glass knives using the LKB Knifemaker 7801A. | At DTU Nanolab we offer the possibility to make glass knives for ultramicrotomy applications using the LKB Knifemaker 7801A. | ||
Manual of LKB Knifemaker 7801A | [https://labmanager.dtu.dk/view_binary.php?class=MiscDocument&id=15&name=LKB_Knifemaker_7800B_Manual.pdf Manual of LKB Knifemaker 7801A] ''- requires login'' <br /> | ||
[[File:Knifemaker.jpg|300px|thumb|left|LKB Knifemaker Location at DTU Nanolab Building 307 Room 906]]<br clear="all" /> | [[File:Knifemaker.jpg|300px|thumb|left|LKB Knifemaker Location at DTU Nanolab Building 307 Room 906]]<br clear="all" /> | ||
| Line 137: | Line 134: | ||
== Leica EM CPD300 == | == Leica EM CPD300 == | ||
The CPD | The CPD allows for ideal preservation of specimen's microstructures during drying processes prior to SEM analysis. Since air drying could cause severe deformation and collapse of microstructure due to the effects of high surface tension to air, the water in the biological specimen is replaced with a suitable inert fluid (“transitional fluid”-CO2) which has a lower surface tension to air. This would thus reduce severe structural damages during drying processes. | ||
Because liquid CO2 is not sufficiently miscible with water, a third medium commonly Acetone or Ethanol is used as “intermediate fluid”. The specimen is first dehydrated through | Because liquid CO2 is not sufficiently miscible with water, a third medium commonly Acetone or Ethanol is used as “intermediate fluid”. The specimen is first dehydrated through various concentrations of the intermediate fluid and thus completely replacing the water in the specimen. Afterwards, the “intermediate fluid” is replaced with the “transitional fluid” (CO2) which can then convert from liquid to gas phase without surface tension effects which distort morphology and ultra-structure. | ||
[https://labmanager.dtu.dk/view_binary.php?class=MiscDocument&id=15&name=EM_CPD300_Operating_manual_small.pdf Operating manual] ''- requires login'' <br /> | |||
[[File:EM CPD300.jpg|300px|thumb|left|Leica EM CPD300 Location at DTU Nanolab Building 314 Room 040]]<br clear="all" /> | [[File:EM CPD300.jpg|300px|thumb|left|Leica EM CPD300 Location at DTU Nanolab Building 314 Room 040]]<br clear="all" /> | ||
| Line 160: | Line 157: | ||
* Capacity is 26L | * Capacity is 26L | ||
[[File:IMG 9634.jpg|400px|thumb|left|TS9026 Drying oven Location at DTU Nanolab Building | [[File:IMG 9634.jpg|400px|thumb|left|TS9026 Drying oven Location at DTU Nanolab Building 307 Room 903]]<br clear="all" /> | ||
For further information on the equipment usage contact mktracy@dtu.dk [https://www.dtu.dk/english/service/phonebook/person?id=141983&cpid=260636&tab=0]. | For further information on the equipment usage contact mktracy@dtu.dk [https://www.dtu.dk/english/service/phonebook/person?id=141983&cpid=260636&tab=0]. | ||
| Line 176: | Line 173: | ||
== Mini tube rotator == | == Mini tube rotator == | ||
The mini | The mini tube rotator can be used for rotating various sized laboratory tubes at several mixing angles at speeds ranging from 4 to 18 min–1. | ||
| Line 186: | Line 183: | ||
* Cold room and incubator compatible | * Cold room and incubator compatible | ||
[[File:IMG_9636.jpg|400px|thumb|left|Mini tube rotator Location at DTU Nanolab Building | [[File:IMG_9636.jpg|400px|thumb|left|Mini tube rotator Location at DTU Nanolab Building 307 Room 903]]<br clear="all" /> | ||
For further information on the equipment usage contact mktracy@dtu.dk [https://www.dtu.dk/english/service/phonebook/person?id=141983&cpid=260636&tab=0]. | For further information on the equipment usage contact mktracy@dtu.dk [https://www.dtu.dk/english/service/phonebook/person?id=141983&cpid=260636&tab=0]. | ||
<br clear="all" /> | <br clear="all" /> | ||
== Centrifuge == | == Mini Centrifuge == | ||
The Eppendorf Mini Spin plus centrifuge is a desktop centrifuge | The Eppendorf Mini Spin plus centrifuge is a desktop centrifuge and has a user friendly digital display for time and speed. | ||
Specifications: | |||
* Max. capacity 12 x 1.5/2.0 mL | |||
* Max. RCF 14 100 g | |||
* Speed 800 - 14 500 rpm (100 rpm steps) | |||
* Acceleration time 13 s | |||
* Timer 15 s to 99 mins | |||
[https://labmanager.dtu.dk/view_binary.php?class=MiscDocument&id=15&name=Eppendorf_Mini_Spin_plus_centrifuge_Original_Instructions.pdf Instruction manual] ''- requires login'' <br /> | |||
[[File:Mini Spin centrifuge.jpg|400px|thumb|left|Eppendorf Mini Spin centrifuge Location at DTU Nanolab Building | [[File:Mini Spin centrifuge.jpg|400px|thumb|left|Eppendorf Mini Spin centrifuge Location at DTU Nanolab Building 307 Room 903]]<br clear="all" /> | ||
For further information on the equipment usage contact mktracy@dtu.dk [https://www.dtu.dk/english/service/phonebook/person?id=141983&cpid=260636&tab=0]. | For further information on the equipment usage contact mktracy@dtu.dk [https://www.dtu.dk/english/service/phonebook/person?id=141983&cpid=260636&tab=0]. | ||
| Line 205: | Line 210: | ||
== Magnetic stirrer == | == Magnetic stirrer == | ||
The myPlate magnetic stirrer | The myPlate magnetic stirrer is ideal for homogeneous mixing of chemicals. | ||
Specifications: | Specifications: | ||
*High chemical resistance | *High chemical resistance | ||
*Can be used at 5 to 40 °C (80% relative humidity), in an incubator or cold room | *Can be used at 5 to 40 °C (80% relative humidity), in an incubator or cold room | ||
*Speed range (min-1) | *Speed range 100 to 2500 (min-1) | ||
[[File:myPlate magnetic stirrer.jpg|400px|thumb|left|myPlate magnetic stirrer Location at DTU Nanolab Building | [[File:myPlate magnetic stirrer.jpg|400px|thumb|left|myPlate magnetic stirrer Location at DTU Nanolab Building 307 Room 903]]<br clear="all" /> | ||
For further information on the equipment usage contact mktracy@dtu.dk [https://www.dtu.dk/english/service/phonebook/person?id=141983&cpid=260636&tab=0]. | For further information on the equipment usage contact mktracy@dtu.dk [https://www.dtu.dk/english/service/phonebook/person?id=141983&cpid=260636&tab=0]. | ||
| Line 224: | Line 225: | ||
== Pulsing Vortex Mixer == | == Pulsing Vortex Mixer == | ||
The VWR pulsing vortex mixer | The VWR pulsing vortex mixer provides ideal mixing of solutions or chemicals. | ||
| Line 232: | Line 233: | ||
* Have timer from 1 s to 160 h | * Have timer from 1 s to 160 h | ||
[[File:IMG_9635.jpg|400px|thumb|left|VWR Pulsing Vortex Mixer Location at DTU Nanolab Building | [https://labmanager.dtu.dk/view_binary.php?class=MiscDocument&id=15&name=VWR_pulsing_vortex_mixer_Instruction_Manual.pdf Instruction manual] ''- requires login'' <br /> | ||
[[File:IMG_9635.jpg|400px|thumb|left|VWR Pulsing Vortex Mixer Location at DTU Nanolab Building 307 Room 903]]<br clear="all" /> | |||
For further information on the equipment usage contact mktracy@dtu.dk [https://www.dtu.dk/english/service/phonebook/person?id=141983&cpid=260636&tab=0]. | For further information on the equipment usage contact mktracy@dtu.dk [https://www.dtu.dk/english/service/phonebook/person?id=141983&cpid=260636&tab=0]. | ||
| Line 241: | Line 243: | ||
== Magnetic hotplate stirrer == | == Magnetic hotplate stirrer == | ||
VWR Professional hotplate | VWR Professional hotplate stirrer is ideal for stirring chemicals with controlled high temperature. An external resistance thermometer (RTD) probe option is available for temperature control of the sample. | ||
| Line 252: | Line 254: | ||
*Includes external RTD temperature probe kit | *Includes external RTD temperature probe kit | ||
[[File:Magnetic hotplate stirrer.jpeg|400px|thumb|left|VWR Magnetic hotplate stirrer Location at DTU Nanolab Building 314 Room 040]]<br clear="all" /> | [[File:Magnetic hotplate stirrer.jpeg|400px|thumb|left|VWR Magnetic hotplate stirrer Location at DTU Nanolab Building 314 Room 040]]<br clear="all" /> | ||
| Line 262: | Line 262: | ||
== Hotplate == | == Hotplate == | ||
VWR Hotplate W10 is suitable for drying paraffin sections on slides or for de-icing tools when doing cryo experiments. | VWR Hotplate W10 is suitable for drying paraffin sections on microscope slides or for de-icing tools when doing cryo experiments. | ||
Specifications: | |||
*Electronic touch display | *Electronic touch display | ||
*Sleek and compact | *Sleek and compact | ||
*Ideal size for drying up to 40 slides | *Ideal size for drying up to 40 microscope slides | ||
*Temperature range between ambient and +89 °C | *Temperature range between ambient and +89 °C | ||
*Digital thermostat | *Digital thermostat | ||
[https://labmanager.dtu.dk/view_binary.php?class=MiscDocument&id=15&name=VWR_Hotplate_W10_Instruction_Manual.pdf Instruction manual] ''- requires login'' <br /> | |||
[[File:VWR Hotplate W10.jpg|400px|thumb|left|VWR Hotplate W10 Location at DTU Nanolab Building | [[File:VWR Hotplate W10.jpg|400px|thumb|left|VWR Hotplate W10 Location at DTU Nanolab Building 307 Room 903]]<br clear="all" /> | ||
For further information on the equipment usage contact mktracy@dtu.dk [https://www.dtu.dk/english/service/phonebook/person?id=141983&cpid=260636&tab=0]. | For further information on the equipment usage contact mktracy@dtu.dk [https://www.dtu.dk/english/service/phonebook/person?id=141983&cpid=260636&tab=0]. | ||
| Line 282: | Line 283: | ||
== Analytical balance PX224 == | == Analytical balance PX224 == | ||
The Ohaus Pioneer PX224 | The Ohaus Pioneer PX224 offers high accuracy and repeatability weight measurements. | ||
Specifications: | |||
*Weighing capacity is 220 g | *Weighing capacity is 220 g | ||
*Readability is 0.1 mg | *Readability is 0.1 mg | ||
*Stabilisation time is 4 s | *Stabilisation time is 4 s | ||
*A static removal bar (permanent static electric dissipative ABS) provides a convenient grounding location | *A static removal bar (permanent static electric dissipative ABS) provides a convenient grounding location | ||
*Applications include basic weighing, part counting, percent weighing, dynamic weighing and density determination | *Applications include basic weighing, part counting, percent weighing, dynamic weighing and density determination | ||
[[File:Ohaus Analytical Balance PX224.jpg|400px|thumb|left|Ohaus PX224 analytical balance Location at DTU Nanolab Building | |||
[[File:Ohaus Analytical Balance PX224.jpg|400px|thumb|left|Ohaus PX224 analytical balance Location at DTU Nanolab Building 307 Room 903]]<br clear="all" /> | |||
For further information on the equipment usage contact mktracy@dtu.dk [https://www.dtu.dk/english/service/phonebook/person?id=141983&cpid=260636&tab=0]. | For further information on the equipment usage contact mktracy@dtu.dk [https://www.dtu.dk/english/service/phonebook/person?id=141983&cpid=260636&tab=0]. | ||
| Line 302: | Line 301: | ||
== pH meter == | == pH meter == | ||
The pH meter allows for accurate pH measurements of chemicals or ideal when making buffers. | |||
[[File:VWR pH meter.jpg|400px|thumb|left|VWR pH meter Location at DTU Nanolab Building 314 Room 040]]<br clear="all" /> | [[File:VWR pH meter.jpg|400px|thumb|left|VWR pH meter Location at DTU Nanolab Building 314 Room 040]]<br clear="all" /> | ||
For further information on the equipment usage contact mktracy@dtu.dk [https://www.dtu.dk/english/service/phonebook/person?id=141983&cpid=260636&tab=0]. | |||
<br clear="all" /> | |||
== Midi 40 CO2 Incubator == | |||
The incubator is suitable for the incubation of cell culture and operates at temperatures ranging from 5°C above ambient temperature to 60°C ±0.2°C. | |||
[[File:Midi 40 CO2 Incubator.jpg|400px|thumb|left|Midi 40 CO2 Incubator Location at DTU Nanolab Building 307 Room 903]]<br clear="all" /> | |||
For further information on the equipment usage contact mktracy@dtu.dk [https://www.dtu.dk/english/service/phonebook/person?id=141983&cpid=260636&tab=0]. | For further information on the equipment usage contact mktracy@dtu.dk [https://www.dtu.dk/english/service/phonebook/person?id=141983&cpid=260636&tab=0]. | ||
Latest revision as of 13:02, 27 October 2023
Feedback to this page: click here
This section is written by DTU Nanolab internal if nothing else is stated.
Plunge Freezer
Leica EM GP2
Plunge freezing is a cryo-fixation method used to preserve samples in their native state prior to cryo-electron microscopy. The EM GP2 plunge freezes fluid or extremely thin samples spread on an electron microscopy grid into liquid ethane and afterwards excess fluid is removed by automatic blotting. Prior to freezing, the sample is maintained in a temperature and humidity controlled environmental chamber which is adjustable between +4°C and +60°C and room humidity to 99 %.
The main steps of this technique is as follows:
1. The sample is spread onto a glow discharged EM grid
2. The liquid droplet is then blotted with filter paper until only a very thin film of fluid remains
3. The grid is then rapidly plunged into a cryogen (usually liquid ethane)
4. The grid is afterwards stored in a grid box submerged in liquid nitrogen until finally loaded into the cryo-electron microscope for imaging
Operating manual - requires login
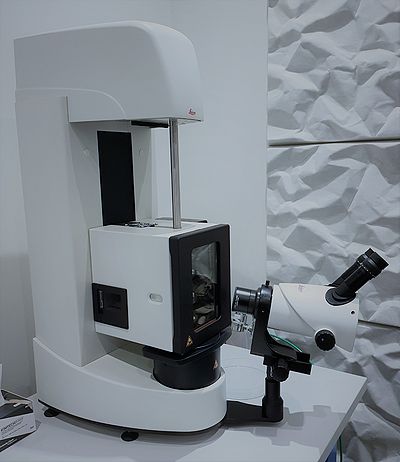
For further information on the equipment usage or training contact mktracy@dtu.dk [1].
Microtome
RMC MT-7 Microtome
Our RMC MT-7 Microtome is a vintage piece of equipment and can be used for specimen sample preparation for SEM/EDX analysis and/or for cutting relative thin slices (approx. 200nm thick) for TEM analysis. First, the specimen needs to be embedded into a resin or an epoxy, and then can be sectioned using a glass or diamond knife.
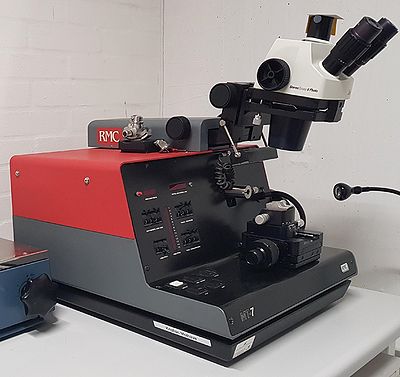
For further information about the microtome usage contact mktracy@dtu.dk [2].
Leica EM UC7 Ultramicrotome
The Ultramicrotome Leica EM UC7 provides easy sample preparation of ultrathin sections for TEM, SEM, AFM and LM application. It is suitable for highly skilled or absolute beginners. The Leica ultramicrotome can provide ultra thin sectioning of sample embedded in a resin/epoxy block with a feed range of 1 nm up to 15 µm. Glass or diamond knife can be used for the ultra sectioning of the samples.
The main steps of this technique proceed as follows:
1. Mount sample
2. Mount glass or diamond knife to knife holder
3. Trimming or ultrasectioning of sample
4. Fishing sections
5. Transfer to an EM grid
Operating manual -requires login
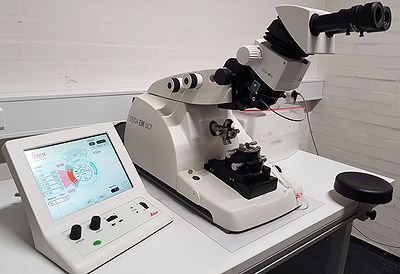
Requirement for training: Completion of the DTU Epoxy course and purchased of own diamond knife. For further information about the equipment usage or training contact mktracy@dtu.dk [3].
Leica EM FC7 Cryo-Ultramicrotome
Within minutes the Leica EM UC7 ultramicrotome can be change to a cryo-ultramicrotome by mounting the cryo chamber EM FC7. Using the cryo-ultramicrotome, cryo-sections (-15° to -185°C) can be prepared for TEM, SEM, AFM and LM applications.
The main steps of this technique proceed as follows:
1. Set up the cryo chamber EM FC7 to the EM UC7 apparatus
2. Mount both the trim and sectioning diamond knives to the knive holder and set up in the cryo chamber
3. Connect the pump tube between the liquid nitrogen Dewar and the ultramicrotome apparatus
4. Fill up liquid nitrogen Dewar
5. Let equipment to cool down for 1 hour
6. Meanwhile prepare samples (Cut big samples to smaller pieces)
7. Freeze sample in liquid nitrogen and mount sample
8. Trimming and ultrasectioning of sample
9. Collecting sections and transfer to an EM grid
Operating manual - requires login
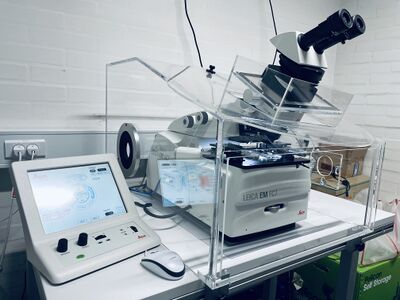
Requirement for training: Purchased of own diamond knife. For further information about the equipment usage or training contact mktracy@dtu.dk [4].
KnifeMaker
LKB Knifemaker 7801A
At DTU Nanolab we offer the possibility to make glass knives for ultramicrotomy applications using the LKB Knifemaker 7801A.
Manual of LKB Knifemaker 7801A - requires login
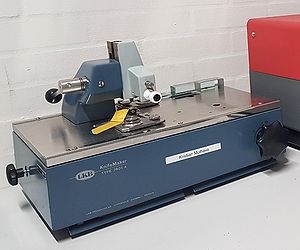
For further information about the knifemaker usage and training contact mktracy@dtu.dk [5].
Critical point dryer
Leica EM CPD300
The CPD allows for ideal preservation of specimen's microstructures during drying processes prior to SEM analysis. Since air drying could cause severe deformation and collapse of microstructure due to the effects of high surface tension to air, the water in the biological specimen is replaced with a suitable inert fluid (“transitional fluid”-CO2) which has a lower surface tension to air. This would thus reduce severe structural damages during drying processes.
Because liquid CO2 is not sufficiently miscible with water, a third medium commonly Acetone or Ethanol is used as “intermediate fluid”. The specimen is first dehydrated through various concentrations of the intermediate fluid and thus completely replacing the water in the specimen. Afterwards, the “intermediate fluid” is replaced with the “transitional fluid” (CO2) which can then convert from liquid to gas phase without surface tension effects which distort morphology and ultra-structure.
Operating manual - requires login
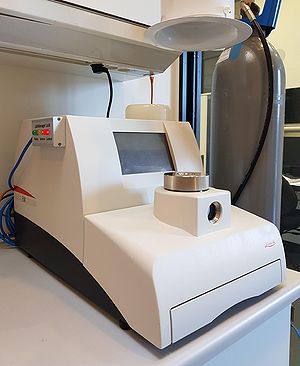
For further information on the CPD usage or training contact mktracy@dtu.dk [6].
Drying oven
The TS9026 drying oven is of 26L capacity and is used for epoxy embedding experiments.
Specifications:
- Temperature range is from 2°C to 250°C
- Fan speed is 0 to 10
- Capacity is 26L
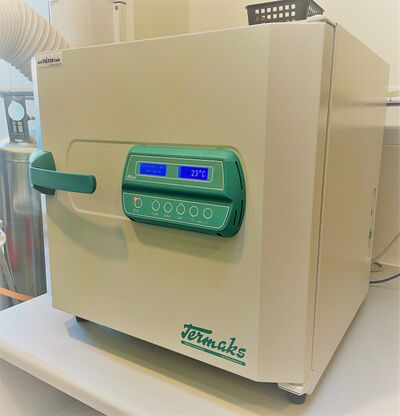
For further information on the equipment usage contact mktracy@dtu.dk [7].
Sonic Dismembrator
The Fisherbrand Model 505 sonic dismembrator apparatus applies sound energy to agitate particles in a sample. For biological applications, sonication may be sufficient to disrupt or deactivate a biological material. For example, sonication is often used to disrupt cell membranes and release cellular contents. In nanotechnology sonication is commonly used for evenly dispersing nanoparticles in liquids.
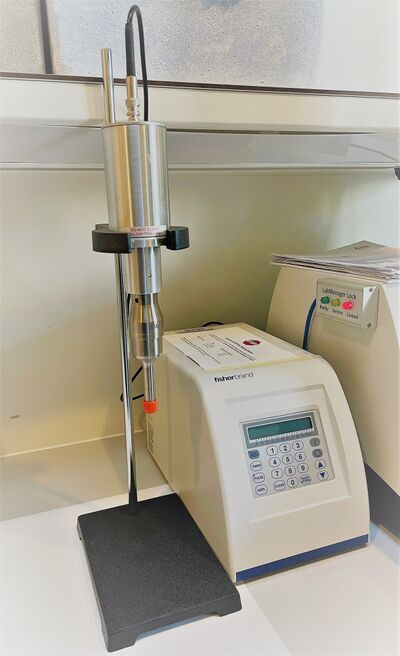
For further information on the equipment usage contact mktracy@dtu.dk [8].
Preparation equipment
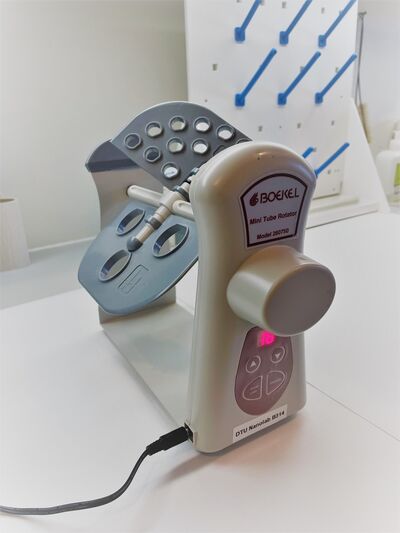
Mini tube rotator
The mini tube rotator can be used for rotating various sized laboratory tubes at several mixing angles at speeds ranging from 4 to 18 min–1.
Specifications:
- Variable speed with LCD display
- Digital microprocessor control
- An adjustable 0 – 90° mixing angle
- Interchangeable carousels for all common laboratory tubes
- Cold room and incubator compatible
For further information on the equipment usage contact mktracy@dtu.dk [9].
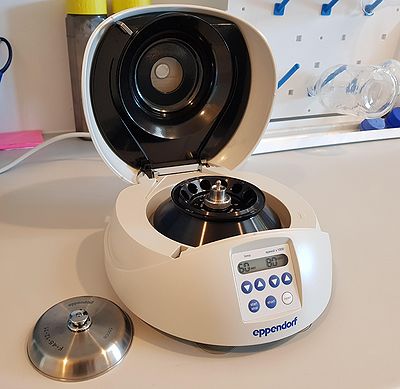
Mini Centrifuge
The Eppendorf Mini Spin plus centrifuge is a desktop centrifuge and has a user friendly digital display for time and speed.
Specifications:
- Max. capacity 12 x 1.5/2.0 mL
- Max. RCF 14 100 g
- Speed 800 - 14 500 rpm (100 rpm steps)
- Acceleration time 13 s
- Timer 15 s to 99 mins
Instruction manual - requires login
For further information on the equipment usage contact mktracy@dtu.dk [10].
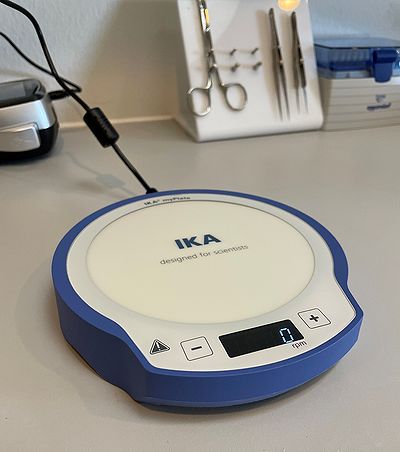
Magnetic stirrer
The myPlate magnetic stirrer is ideal for homogeneous mixing of chemicals.
Specifications:
- High chemical resistance
- Can be used at 5 to 40 °C (80% relative humidity), in an incubator or cold room
- Speed range 100 to 2500 (min-1)
For further information on the equipment usage contact mktracy@dtu.dk [11].
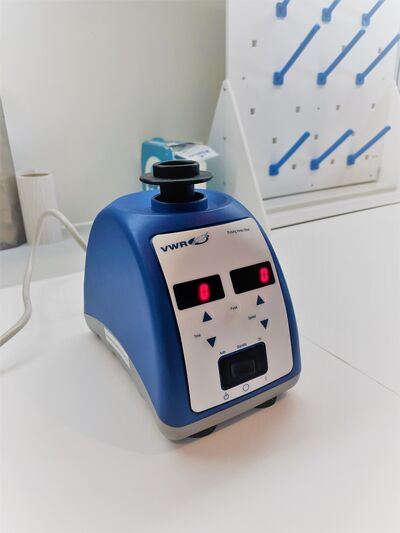
Pulsing Vortex Mixer
The VWR pulsing vortex mixer provides ideal mixing of solutions or chemicals.
Specifications according to the instruction manual:
- Can be used at 4 to 40 °C (maximum 85% relative humidity, non condensing), in an incubator, CO₂ incubator or cold room
- Pulsing model can reduce heat generation and ensures efficient mixing and disruption
- Have timer from 1 s to 160 h
Instruction manual - requires login
For further information on the equipment usage contact mktracy@dtu.dk [12].
Magnetic hotplate stirrer
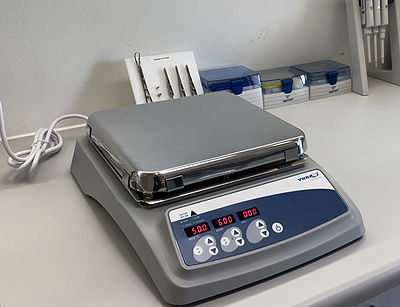
VWR Professional hotplate stirrer is ideal for stirring chemicals with controlled high temperature. An external resistance thermometer (RTD) probe option is available for temperature control of the sample.
Specifications:
- Temperature range (°C) +5 to 400
- Speed range (min-1) 60 to 1600
- Excellent temperature uniformity with consistent stirring at all speeds
- Separate digital displays for temperature, speed and time; show set and actual values. Display will show last used settings, even after power has been turned off
- Cool touch, chemically resistant housing
- Includes external RTD temperature probe kit
For further information on the equipment usage contact mktracy@dtu.dk [13].
Hotplate
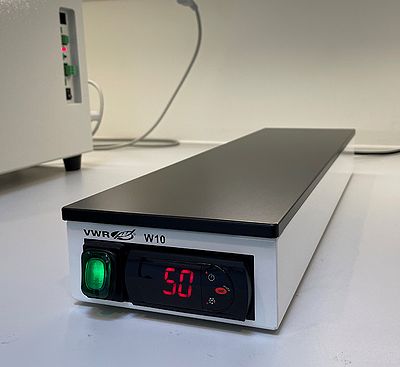
VWR Hotplate W10 is suitable for drying paraffin sections on microscope slides or for de-icing tools when doing cryo experiments.
Specifications:
- Electronic touch display
- Sleek and compact
- Ideal size for drying up to 40 microscope slides
- Temperature range between ambient and +89 °C
- Digital thermostat
Instruction manual - requires login
For further information on the equipment usage contact mktracy@dtu.dk [14].
Analytical balance PX224
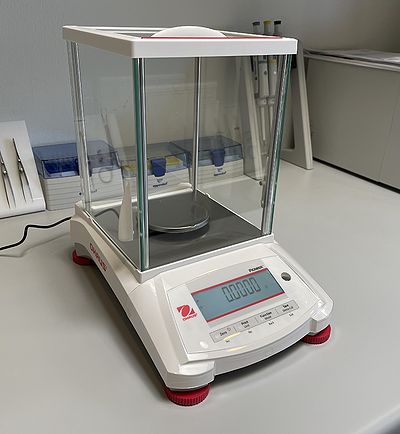
The Ohaus Pioneer PX224 offers high accuracy and repeatability weight measurements.
Specifications:
- Weighing capacity is 220 g
- Readability is 0.1 mg
- Stabilisation time is 4 s
- A static removal bar (permanent static electric dissipative ABS) provides a convenient grounding location
- Applications include basic weighing, part counting, percent weighing, dynamic weighing and density determination
For further information on the equipment usage contact mktracy@dtu.dk [15].
pH meter
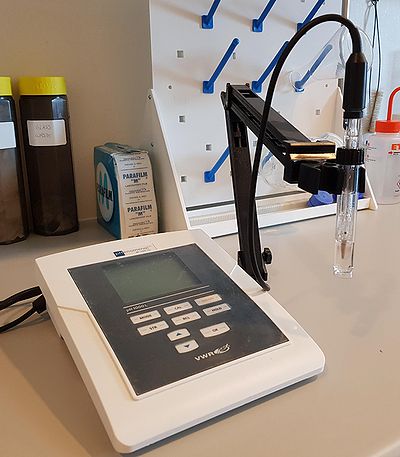
The pH meter allows for accurate pH measurements of chemicals or ideal when making buffers.
For further information on the equipment usage contact mktracy@dtu.dk [16].
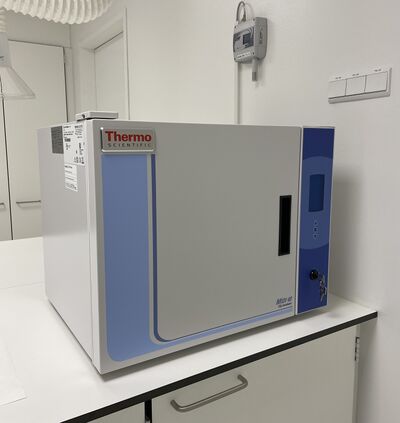
Midi 40 CO2 Incubator
The incubator is suitable for the incubation of cell culture and operates at temperatures ranging from 5°C above ambient temperature to 60°C ±0.2°C.
For further information on the equipment usage contact mktracy@dtu.dk [17].
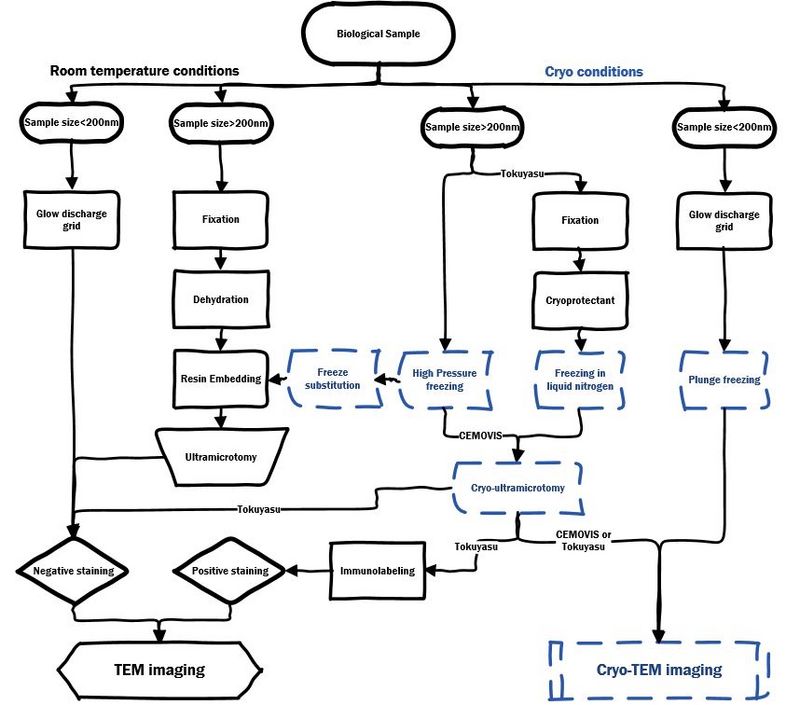
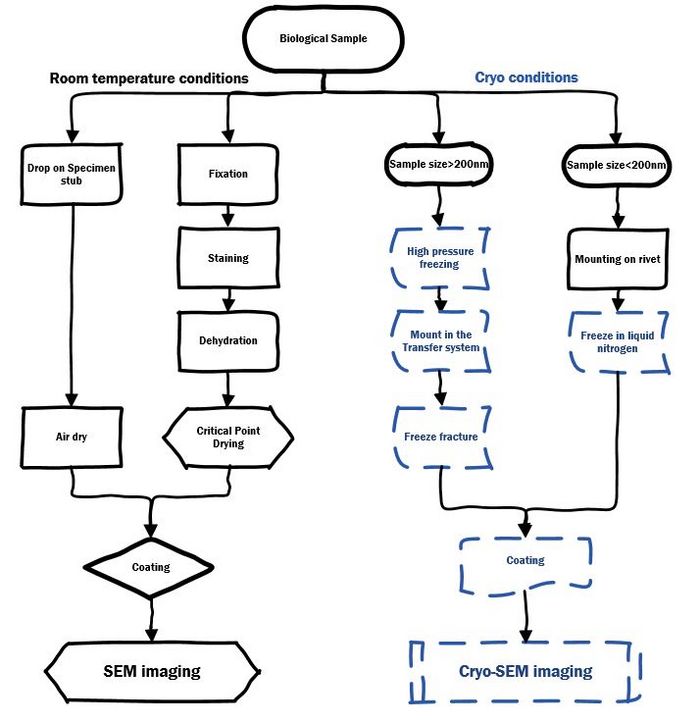
EM sample preparation workflow
For TEM imaging of biological and softmaterial sample at room temperature or cryo conditions:
For SEM imaging of biological and softmaterial sample at room temperature or cryo conditions:
For further information on EM sample preparation of biological and softmaterial samples contact mktracy@dtu.dk [18].
